
 One great convenience that an indie author can place in their Kindle, Nook or Smashwords e-book is a Hyperlinked Table of Contents. This is something I use all the time –it allows me to easily page back and forth.
The one I am using for this is an ancient file for the book that spawned Huw the Bard, so ignore the page numbers. In those days I didn’t know that page numbers are like prisoners—they just weigh you down! If you have seen my previous post on this subject you can quit now and I won’t hold it against you. However, if you are in the middle of formatting your first manuscript, this post may be of use to you!
For print versions, I keep costs down by not wasting precious pages on something the reader won’t use. However, printed technical manuals, textbooks, and cookbooks must include a TOC. In print books, every page you can do without when publishing your novel in paper form will keep the final cost down and make your paperback more affordable for your prospective reader. Very few people will pay $18.99 for a book by an unknown author.
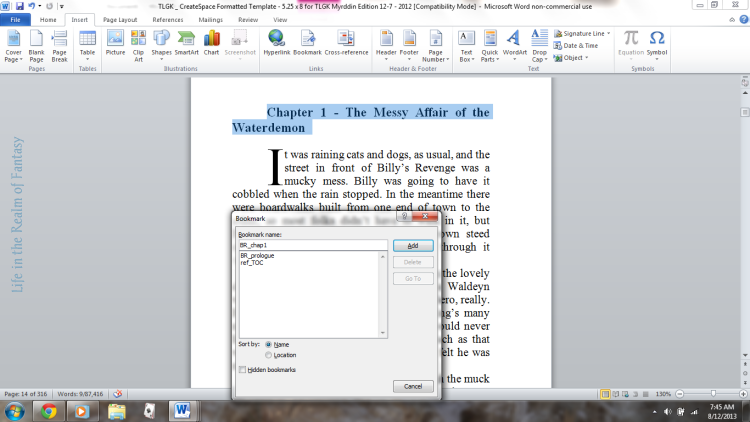
The first thing you want to do is create a bookmark. First highlight the words “Table of Contents” and then go to your ‘Insert’ tab. Click on ‘Bookmark’in that ribbon. Type in the words ref_TOC
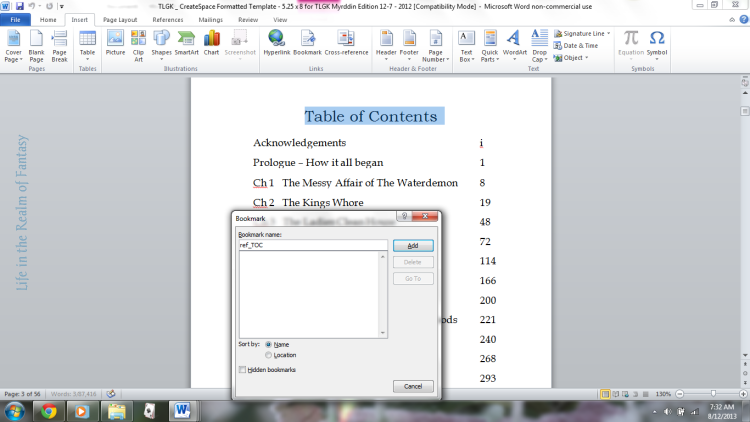
Then click “Add”. In every ms it is important to name the Table of Contents bookmark exactly that, including the underscore, because that’s what Smashwords looks for and it is simply a good practice to have a uniform system for naming files.
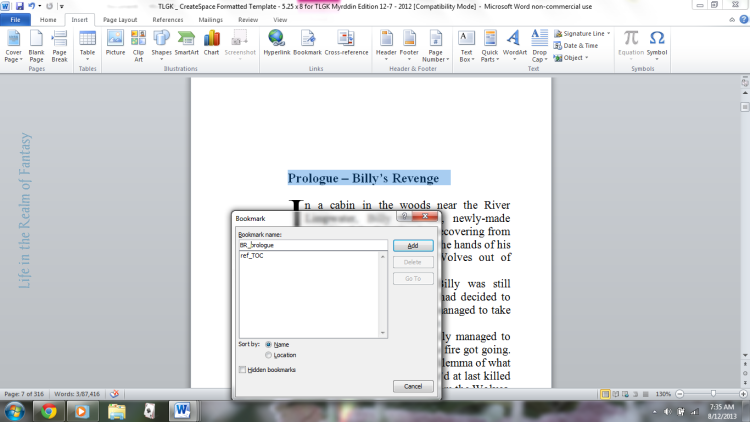
Now it’s time to bookmark the prologue. Scroll down to your prologue and do it exactly the same way as you bookmarked the TOC, but for this ms let’s name it BR_prologue. You will name yours with your ms initials and the word prologue. If you have no prologue, skip this step. See the picture below:
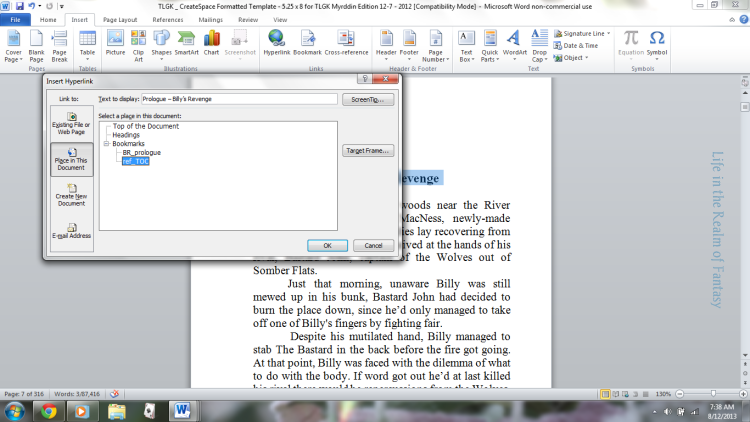
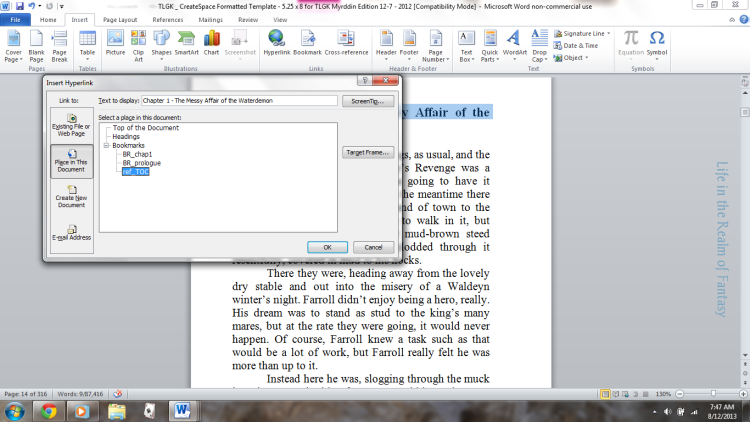
As long as you are there, with the chapter title highlighted, click “insert Hyperlink” on the ribbon. On the left, you want to ‘Link to:’ “Place in this Document”. That will bring up your bookmarks. Select ‘ref_TOC’ and click OK. This will turn your heading blue, which is called a ‘hyperlinky’. Press control and click on the link. it will take you back to the table of contents. Once you have used the hyperlinky it will turn purple. How cool is that! This is how that screen looks:
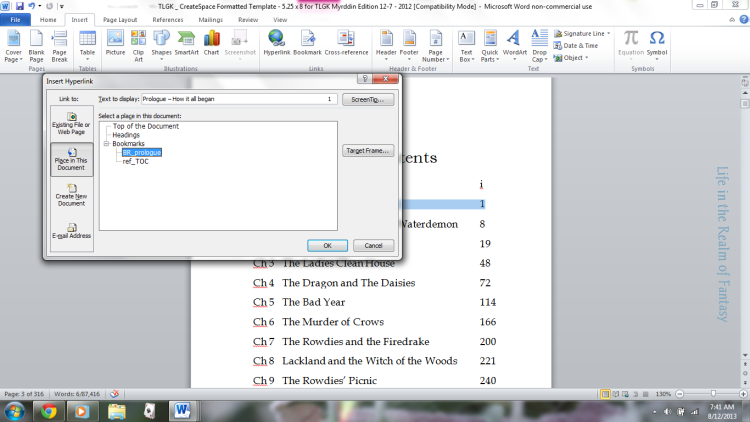
Now that you are back at the Table of Contents, highlight “Prologue and click “insert Hyperlink” on the ribbon. On the left, you want to ‘Link to:’ “Place in this Document”. That will bring up your bookmarks. Select ‘BR_prologue’ and click OK. That will turn it blue. Press control and click on the link. it will take you back to the heading of your prologue.
Do this for the entire table of contents, always remembering to link your chapter heading back to “ref_TOC”, and test each link as you go. Four more pictures just to help you remember:
—-
—-
—-

—-
I hope this helps you in formatting your eBook manuscript. All my books have Smart TOCs. I build the TOC into my final formatted manuscripts when I am assembling the final proofed chapters and inserting maps.
On a side note, a hyperlinked TOC is an incredibly useful tool to help you navigate within any long manuscript whether you intend to publish it or not. Although I had used bookmarks before in the course of my work, when I first began this journey I had no idea that the fancy TOCs I admired so in other people’s e-books were such a simple thing to create.
But that’s the way it always goes–things that seem like they should be hard are often the most simple, while something that should be easy turns into a drama of epic proportions.
Here’s to less drama and more simplicity! Learning how to format an e-book isn’t really that hard, and the wonderful people at both Smashwords and at Amazon have a lot of information freely available to you. Remember, as an indie, you are your own publisher, and what you put out there has to be the best you can make it.
Making use of the free information that is out there on the internet can only help you in this regard!


I appreciate when authors do this. I did it with RC&R. Well, actually, the man who formatted my file did this. Makes it so much easier to go back and find details, especially in a longer read. And then get back to where you were. It’s simple with a paper book, but I get so frustrated with some of my indie reads that don’t have that feature.
LikeLiked by 1 person
Being fond of reviewing books, I like to go back and forth within them, to cement certain things in my mind, and sometime to see what it was I missed that I am confused about!
LikeLiked by 1 person
Reblogged this on S.K. Nicholls and commented:
This comes in handy for us folk who like to page back and forth in ebooks. Especially if it is a longer book. Red Clay and Roses has one and I think any book should. One of the biggest complaints of digital over paper is that people can’t thumb through pages or go back and check details. This makes it so much easier.
LikeLike
I so agree–it really helps to be able to navigate within the ebook as if it were a paper book that you never have to dust!
LikeLiked by 1 person
That’s really interesting to see how it’s done, thanks Connie.
I admit I’m too lazy/short of time to learn formatting, no matter how simple it is once you know how – I just upload my Word document to Draft2Digital and their conversion process does it automatically, TOC included. Takes about 30 seconds 😉
To be fair, I do publish to several platforms through D2D, so I don’t feel it unfair to use their tools to produce my personal use mobi and epub files for uploading elsewhere.
LikeLike
That’s an awesome resource Deborah!
LikeLike
It is, and it’s free too! Plus, their formatting for Createspace is really good too, and if there are any issues, they answer emails fast and efficiently. I published my first novel through them and subsequently my second too, although they no longer deal with Amazon, so I do that platform myself.
LikeLike
Reblogged this on Chris The Story Reading Ape's Blog….. An Author Promotions Enterprise! and commented:
EBOOK AUTHORS – THIS IS FOR YOU 😀
LikeLike
Thank you Chris!
LikeLiked by 1 person
It’s a great article Connie – Thank YOU for writing and posting it 😀
LikeLike
Appreciate all the helpful steps. Thanks
Really like this thought:
“Remember, as an indie, you are your own publisher, and what you put out there has to be the best you can make it.”
LikeLike
Thank you! As indies, our author name is our brand, and so we have the final say on the quality of our product!
LikeLiked by 1 person
Brings back bad memories when I had to do this for a day job for a 500 page manual lol not fun! But totally helpful! Great tutorial 🙂
LikeLike
lol Claire–Some day-jobs give us great skills–that sort of work is where I actually learned how to use MS WORD.
LikeLike
Interesting article, thanks for sharing. I’ve used the MSWord TOC technique, but this method should work across more platforms.
LikeLike
Thank you Dave–I always feel the more free things an indie can do for themselves, the more resources they will have for other aspects of this craft.
LikeLike
Still not quite sure how it works. Fortunately, I have a teenager available to do it for me.
LikeLike
Yes-teenagers are an excellent resource for those of us not born into the era of Borg-style technology!
LikeLike
Reblogged this on theowlladyblog.
LikeLike
Fantastically helpful! Thank you. This is something I’ve never quite mastered, so I’m looking forward to trying it out next time.
LikeLike
@ Geraldine–I’m glad it will be of use to you!
LikeLike
Thanks, Connie, for sharing this helpful information. 🙂
LikeLike
@Suzanne–You are welcome, and I glad to meet you!
LikeLike
Reblogged this on The Way of the Storyteller:.
LikeLike