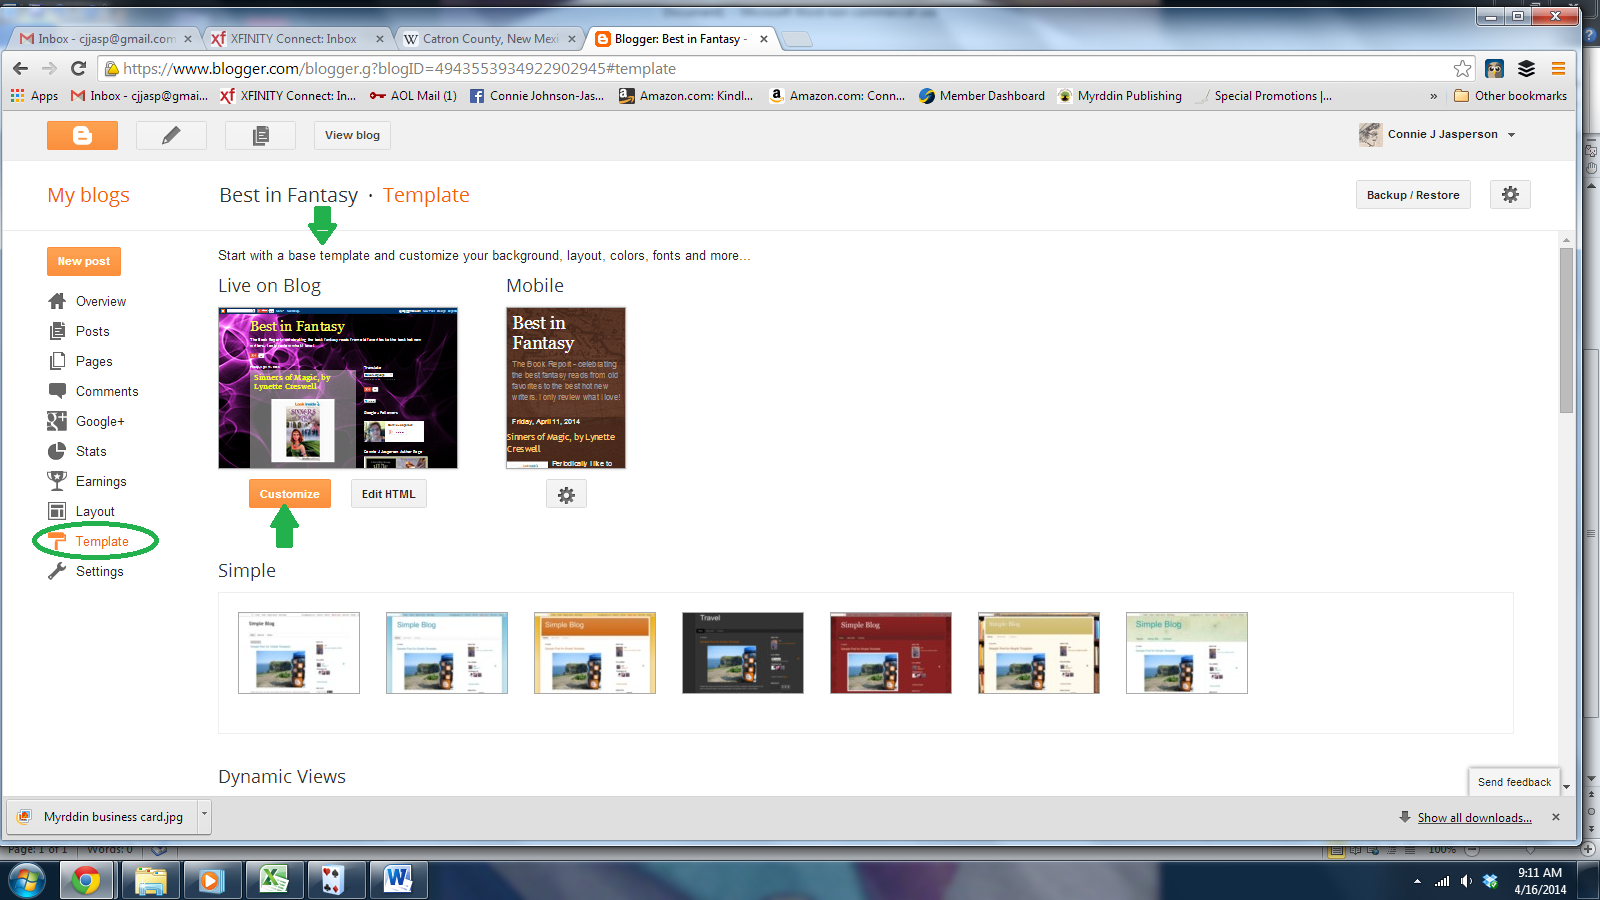
As last week’s post, Creating your author blog part 1, much of this is taken from earlier posts on this subject, so if you have seen it before, thank you for stopping by, and the next post will be on sourcing content for our blog posts.
Once you have your blog set up, and the catchy title picked out, etc., it’s time to start writing. Both WordPress and Blogger offer you the ability to use html (Text) if you choose, which I don’t have a clue about, or to go with the Visual (what you see is what you get). Unless you are a programmer, stay with ‘Visual.
In WordPress, choose a category now for your post–do it first, so you don’t forget to do it. I published this post in the category of writing. Each blog post may have a different category, but you decide what your categories are. If you should forget to choose the category, it will go into the ‘uncategorized’ pile–the dreaded WordPress slush-pile where blogs go to die.
Also in WordPress, chose a few TAGS now, if you know what you’re writing about, so that you don’t forget to tag the post. That button is below the Categories list. Chose tags that most represent the core of your post, so that searchers for that subject will find your post.
For this post, I am using ‘blogger, blogspot, blogging, WordPress, WordPress blog how-to.’
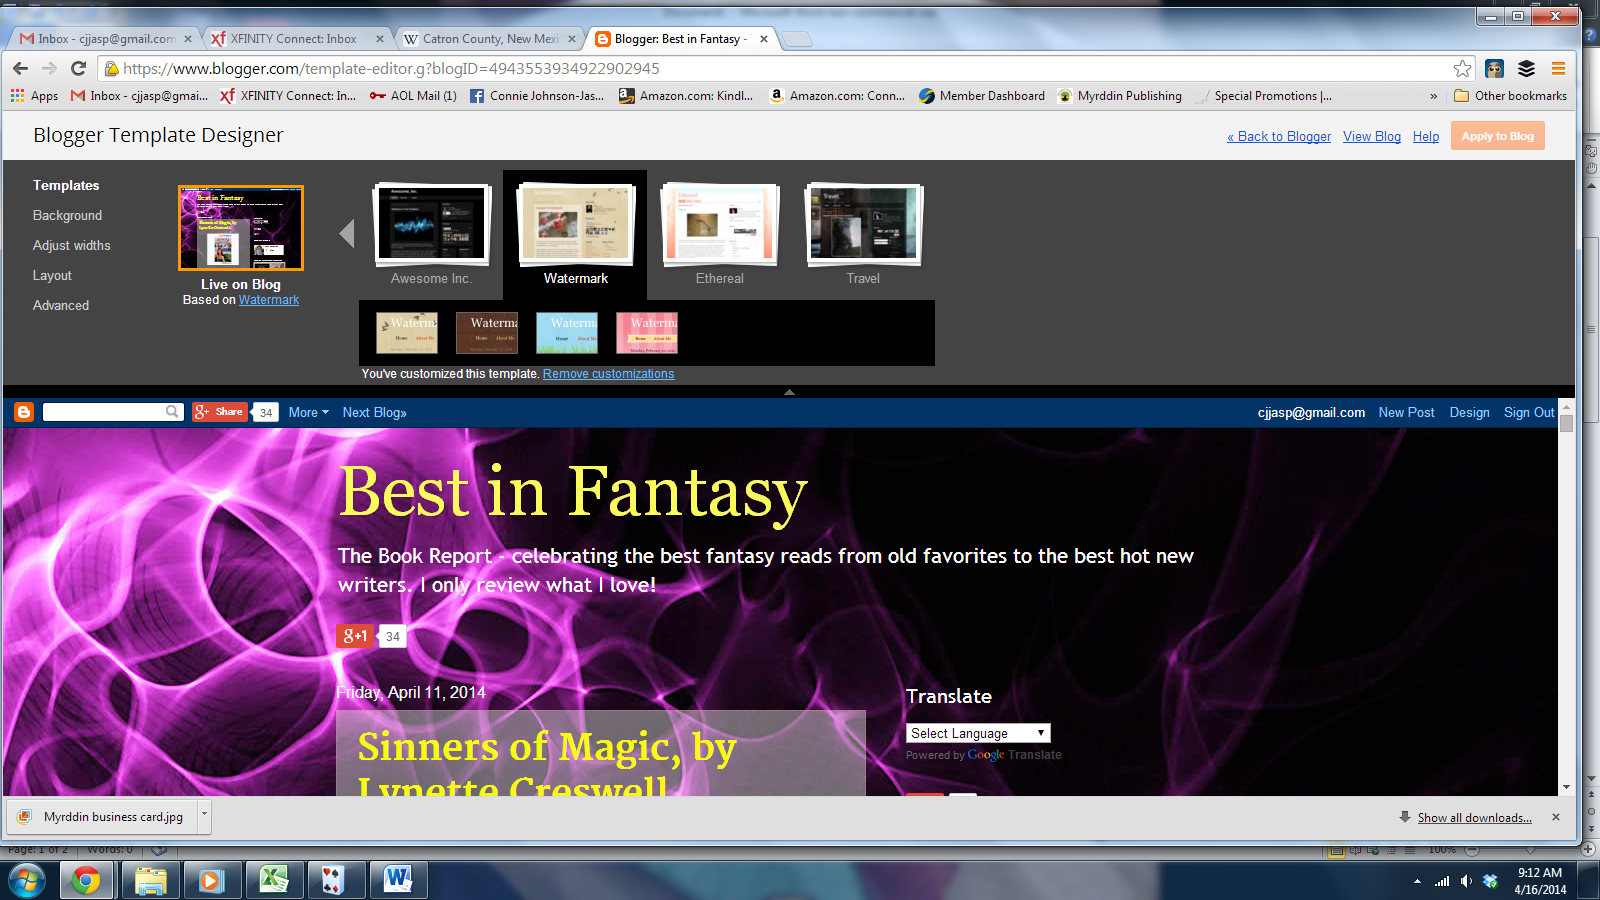
If you are using Blogger, PICK YOUR LABELS NOW–Blogger doesn’t use categories, so your labels are very important. On the right-hand side, click on ‘LABELS’ and simply type your key words into the BOX, separated by commas. In Blogger, LABELS are what TAGS are in WordPress, so use words that represent the core of what you are blogging about so that interested searcher will find your blog.
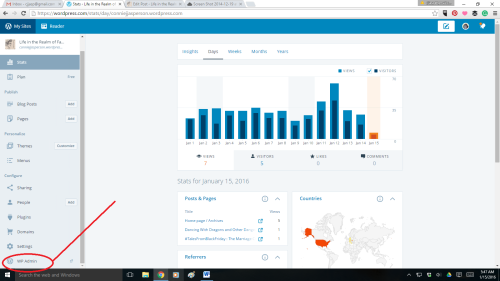
Next, schedule your post: In WordPress, in the the right-hand menu-list you will open the the ‘status bar.’ Use the calendar to pick the date and set the time of day you want the post to go live.
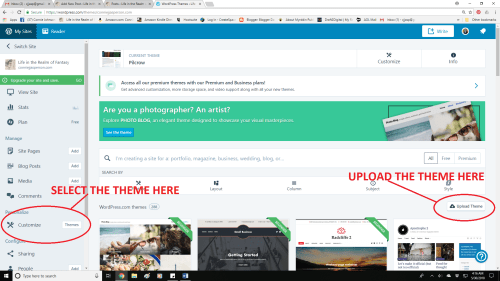
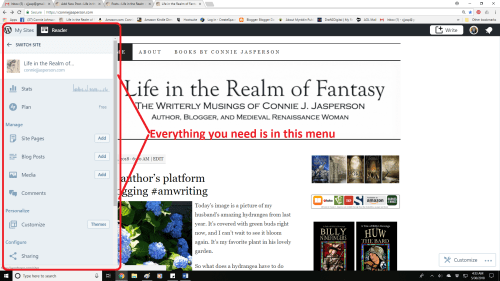
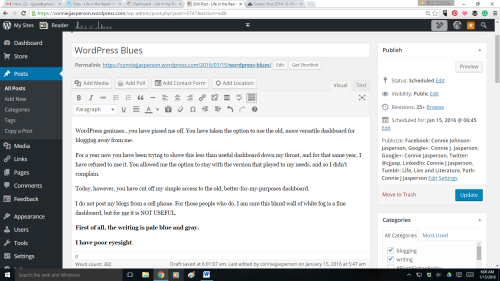
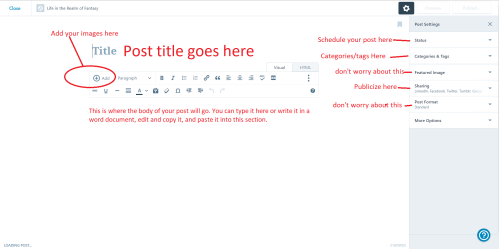
Here is the screenshot that shows you where everything is in WordPress:
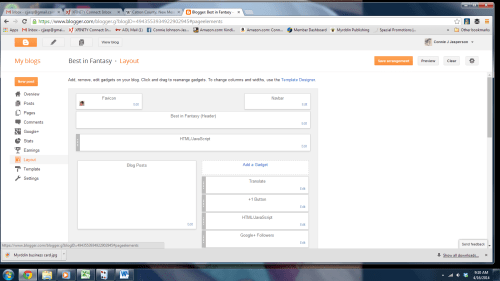
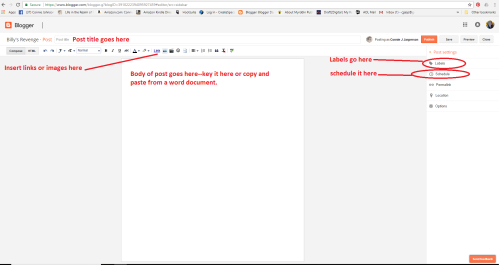
And for Blogger it looks like this:
Now that you have that out-of-the-way, it’s time to blog!
- Hook me with that catchy blog post title! Pretend this post is called “Blogging for beginners.” Pretty boring, but hey – it is what it is.
- Put that title in the white box at the top of the page and DO IT NOW, so you don’t forget to give your post a title.
Now there are two paths for you. You can choose to wing it, keying directly into the post box as I sometimes do, or you can write it on a WORD document, edit it at your leisure, and copy and paste it into the body of the post. (In WordPress, depending on the platform’s mood, you may have to key “cntrl V” to paste it into the post box.)
Both Blogger and WordPress have spell check functions, and both will save at times as you go. However, spell check only picks up misspelled worlds, and doesn’t catch errors that involve correct spelling. When I key directly into the post box, some errors may get overlooked in the proofing process. I do try to correct them but I sometimes don’t notice them for several months, so blogging can be a lesson in learning to laugh at yourself.
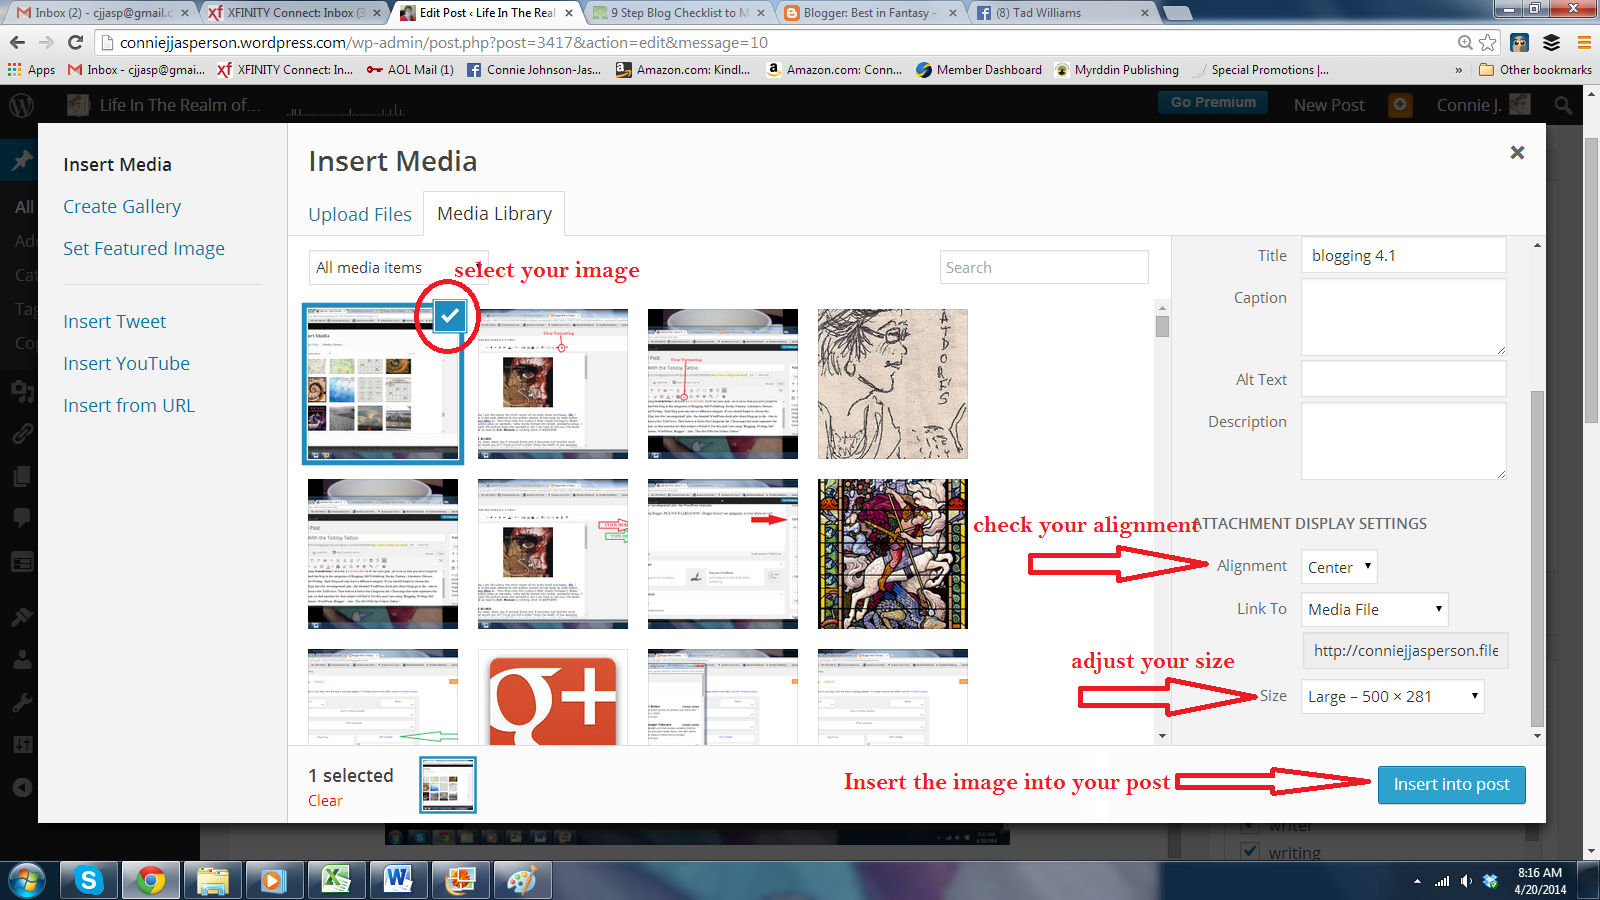
Now we want to add a picture. In WordPress, place your cursor in the body of the blog post and click once at the spot where you will want the image. Then scroll up to the left side of the ribbon (tool box) and click on the circle with a + sign in it, where it says ‘Add’ (when you hover your mouse over it, it will say ‘insert image.’ This symbol is a little obscure, but once you find it, you are good to go.
If this is your first blog post, you won’t have anything in your media library yet, so click on “Upload Files.” Practice uploading images and inserting them, playing with it until you feel comfortable and know how to ensure the image will appear where you want it and will be the size you want it to be. Then, once the image in the body of the post you click on the picture, and a new toolbox opens. That is where you make your adjustments for positioning and size. You can even add captions if you wish.
In Blogger you also click on the little picture in the ribbon (when you hover your mouse over it, it will say ‘insert image’). A pop-up menu will appear, and then you will upload the image, decide the placement and the size. This nearly foolproof simplicity is why most people who have “never done this before” like Blogger more than WordPress.
All you have to do now is post your links to Twitter, Facebook, Tumbler and all other social media you can think of. It is quite easy to set up, and you rarely need to refresh those connections.
This is where WordPress really excels.
In WordPress, we have the “publicize” option which will automatically post to our other social sites. In the Settings menu, open “sharing” and click on it. that will take you to the “Sharing Settings” page. Click on the button that says, “Publicize Settings.” That will open a list of what I think of as blog warehouses, places that collect blogs and offer them to their regular readers. You want to activate as many of them as you can.
It will take a long time for you to build up good traffic – when I began in 2011 I averaged 4 to 10 visits a day. I see those months as my training months, a time when I was able to get a feel for this craft. I have a lot more readers now because I have gained many good friends here through WordPress and am diligent about keeping this blog updated.
I highly recommend blogging if you are serious about being an author, as it helps develops your writing craft, especially when you must go in and edit out your mistakes after they have posted. People expect blogs to be a little rougher than other work as it is usually written on the wing but try to do your best work—you want people to buy your books, and they won’t if your blog posts seem illiterate.
As I mentioned above, my next post will discuss the nuts and bolts of sourcing content and writing the posts, including little tricks I use for catching most typos and misspelled words before my work posts.