 I’ve blogged before on this subject, but it is time to talk about it again: making your manuscript ready for submission to an editor, agent, or a publisher. All agents, editors and publishing companies have specific, standardized formatting they want you to use, and these guidelines are posted on their websites.
The submissions page for TOR Forge, one of the Big Boys in the publishing world, clearly says: “Standard manuscript format means margins of at least 1 inch all the way around; indented paragraphs; double-spaced text; and Times New Roman in 12 pitch. Please use one side of the page only. Do not justify the text. Do not bind the manuscript in any way. Make sure the header of the ms. includes your name and/or the title of the book as well as the page number (on every page).”
For the most part this formatting is basically the same from company to company, so once you know what the industry standard is, it’s easy to make your manuscript submission-ready, at least in the area of formatting.
 I’ve said this before, and I will say it again: Do NOT ever use the tab key or the space bar to indent your paragraphs. Many times publishers want electronic submissions and you have no idea what a crapped up mess (sorry for the editor-speak) using the tab key makes out of an electronic manuscript. You most likely will have to go in and remove these tabs by hand and it’s a tedious job, but do it now, if you have been using the tab key.
You might say, “Well I only submit to traditional publishers who all want hard-copy.” That, my friends, it not true. The entire publishing industry is undergoing modernization, and while they do still accept hard-copy, electronic submissions are rapidly becoming the preferred method, even with the larger publishers. Don’t limit your options by refusing to learn a simple trick.
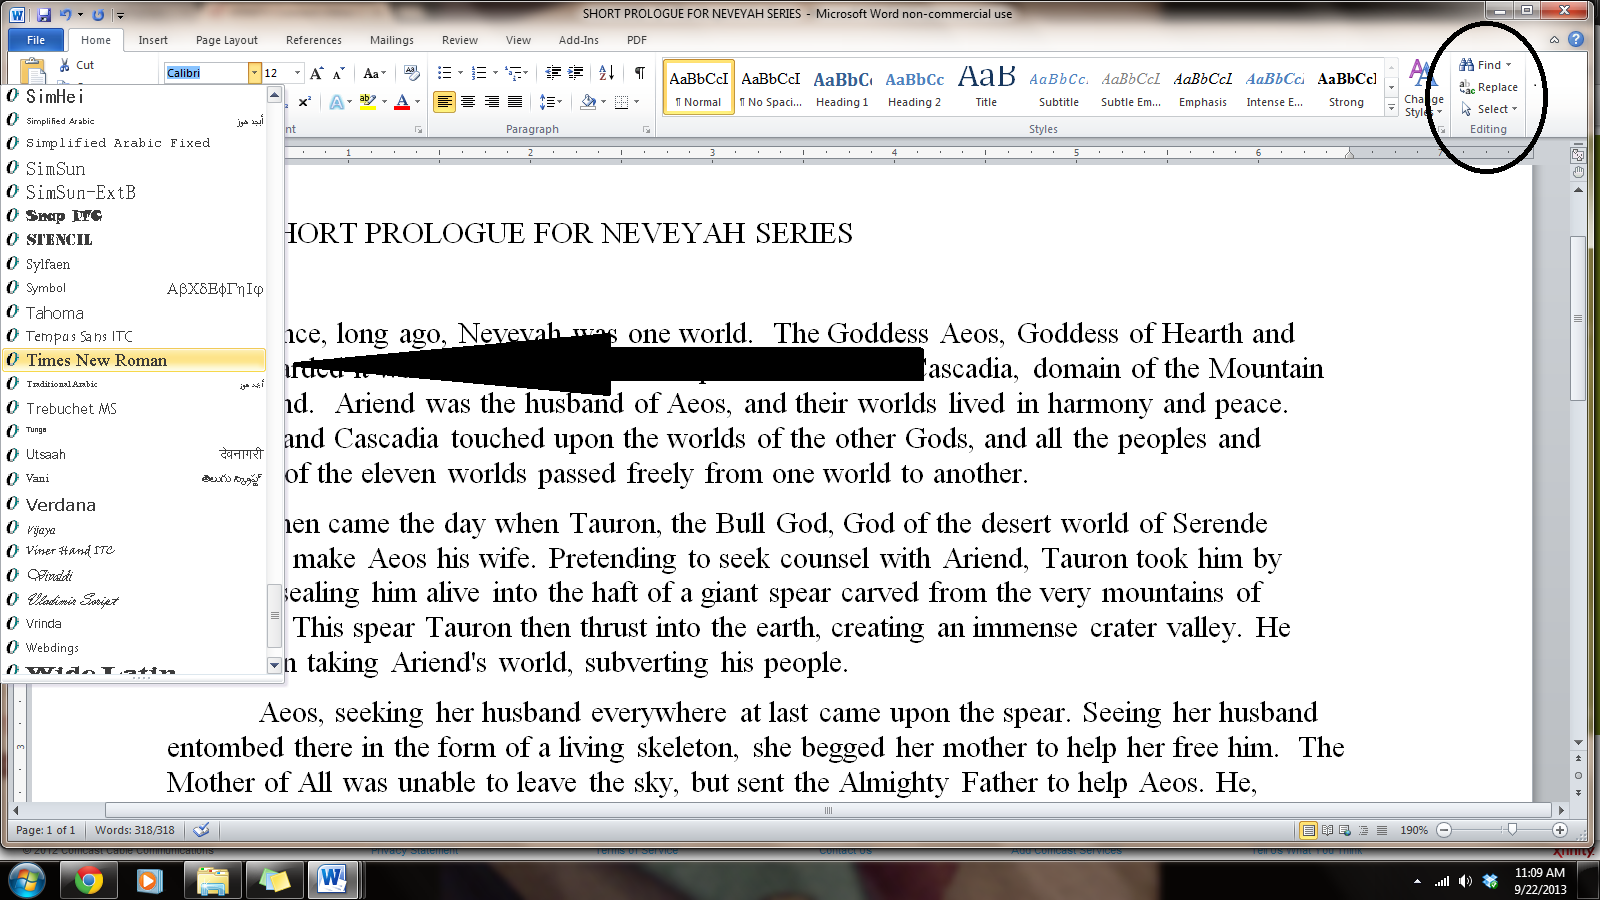
To format your paragraphs indents, first highlight the entire manuscript: on the far right side of the home-tab at the top of your page, click select all. Next, still on the home tab, click on the little box at the lower right of the box that says ‘Paragraph.’ This will open a whole new menu:
- On the indents and spacing tab of the menu: Use standard alignment, align LEFT. The reason we use this format is we are not looking at a finished product here. We are looking at a rough draft that will be sliced, diced and otherwise mutilated many times before we get to the final product. The following pictures are for WORD 2010, as I have not yet upgraded my MS Office program, but the basic ideas are the same.
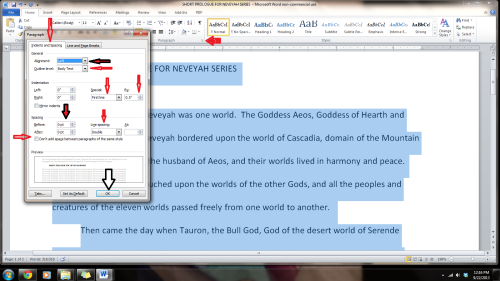
- Indentation: leave that alone or reset both numbers to ‘0’ if you have inadvertently altered it.
- Where it says ‘Special’: on drop-down menu select ‘first line’. On the ‘By’ menu, select ‘0.5’
- ‘Spacing’: set both before and after to ‘0’.
- ‘Line Spacing’: set to ‘double’
Do not forget to click OK at the bottom of the menu.
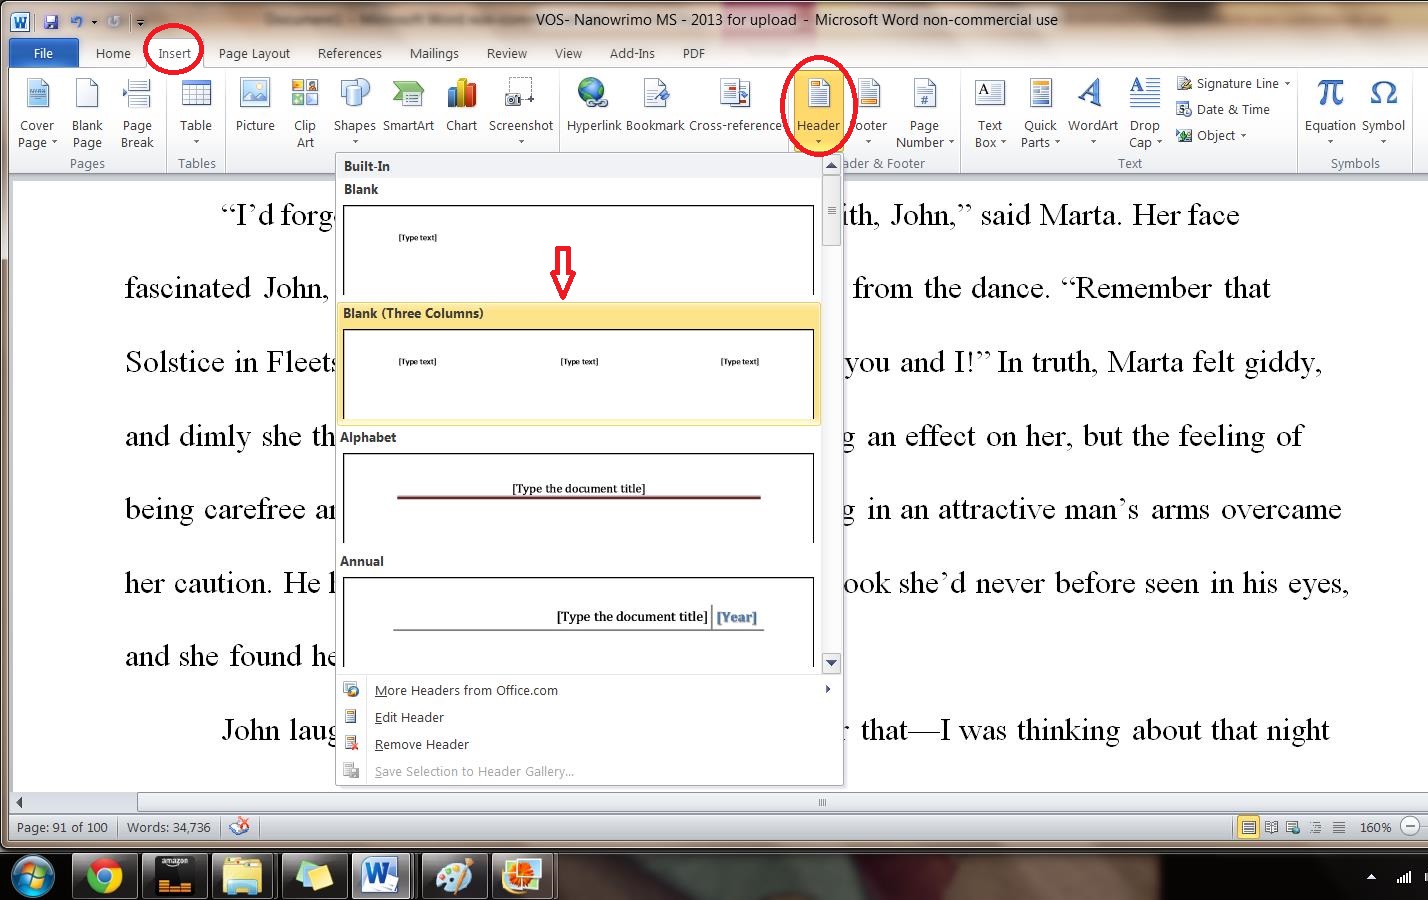
But today we are going to talk about headers and page numbers:
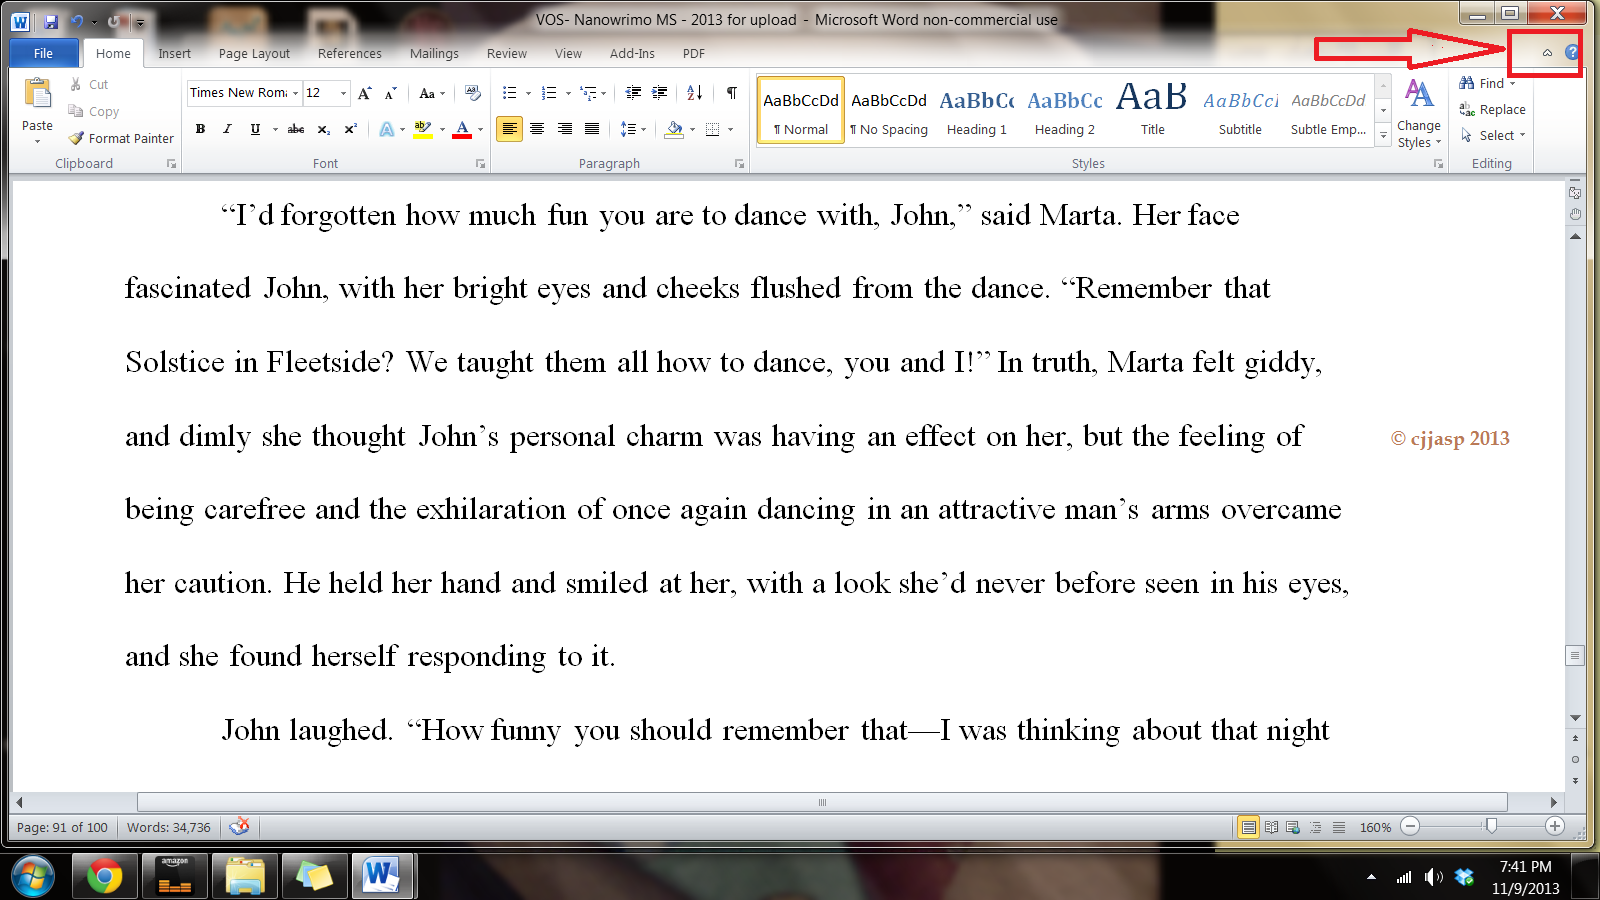
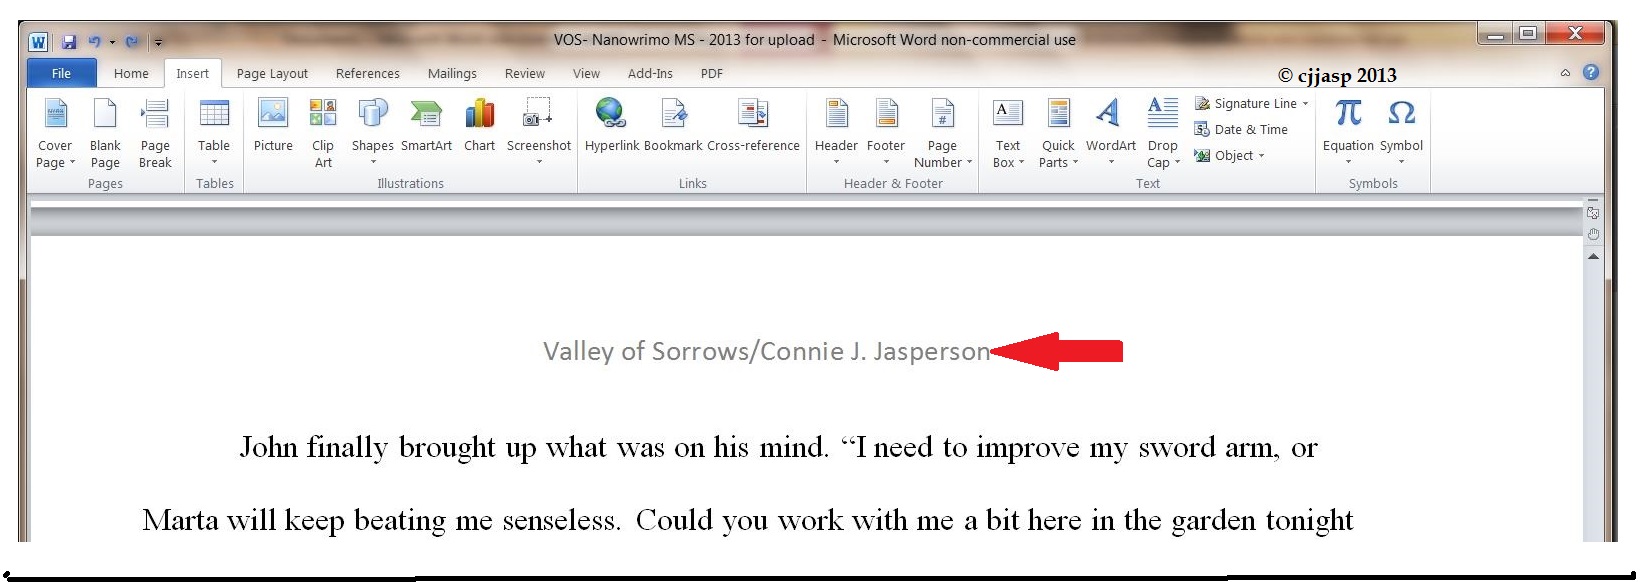
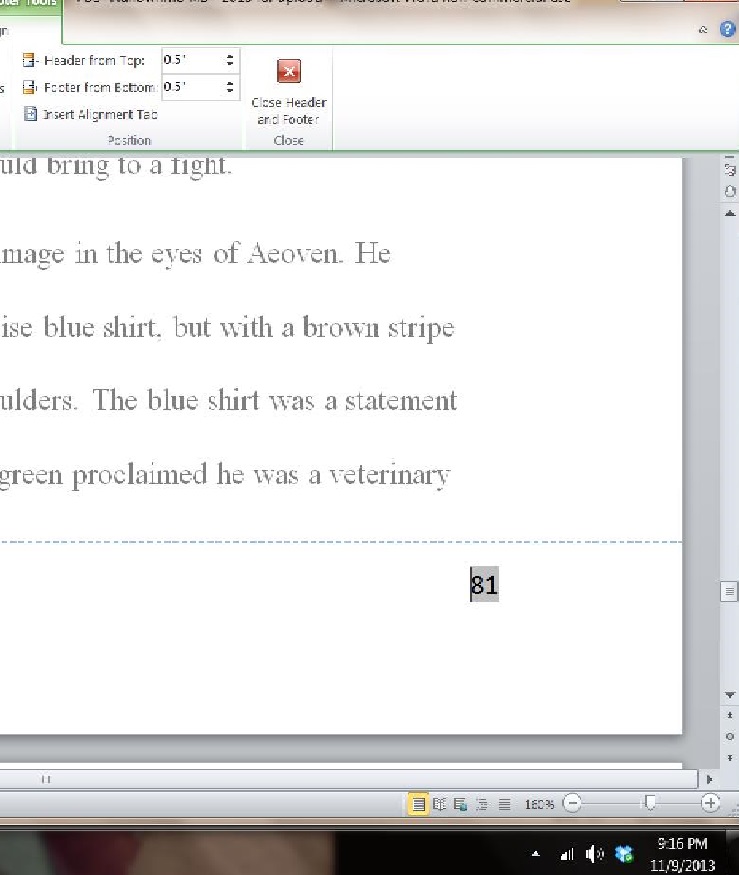
The “Header” is the writing in the margin at the top of each page of a word-processed or faxed document, usually automatically inserted and, in this case, consisting of the title of the book and your name.
Publishers and editors want this because when they receive a print copy, they want them UNBOUND. Each page should be clearly marked with your name and/or the title of the book as well as the page number. Also, publishers and editors who ask for electronic submissions may need to print sections of your work for closer examination. Accidents happen: if the ms falls off a desk, it can easily be reassembled and the editor will always know that brilliant work was written by you.
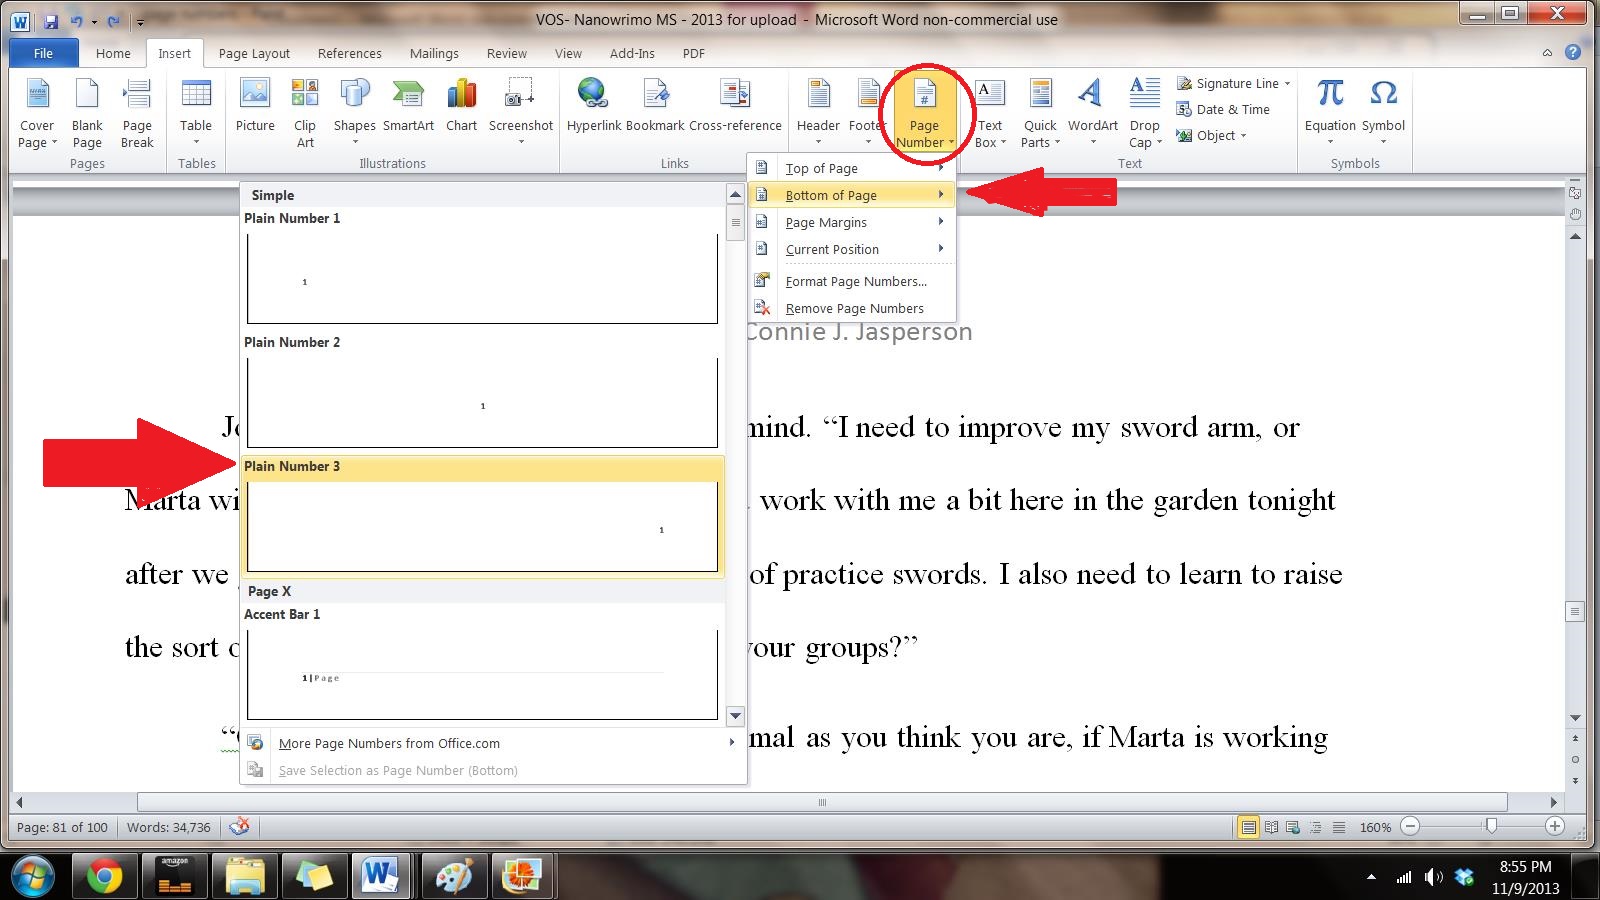
We begin by opening the “insert” tab, and clicking on “page number.” This opens up a new menu. We add the page numbers using this menu.
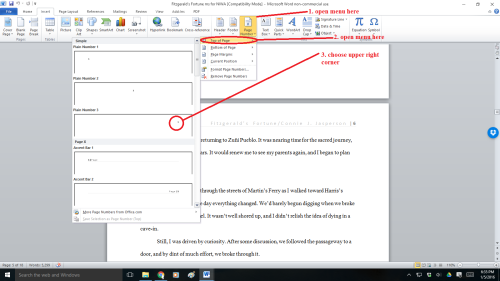
You will insert the Title of the Book and Your Author Name just before the page number, so it will look neat and be aligned to the right. You can do this on the page number tab.
Sometimes, a publisher will specify that the first (title) page have no header or page number, but they want the header and page numbers to begin on page two.
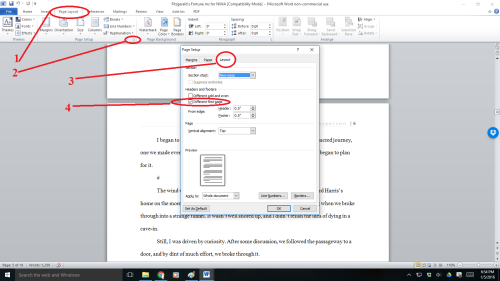
To make the page numbers begin on page two:
- Click anywhere in the document.
- On the Page Layout tab, click the Page Setup Dialog Box Launcher, and
- then click the Layout tab.
- Under Headers and footers, select the Different first page check box, and then click OK.
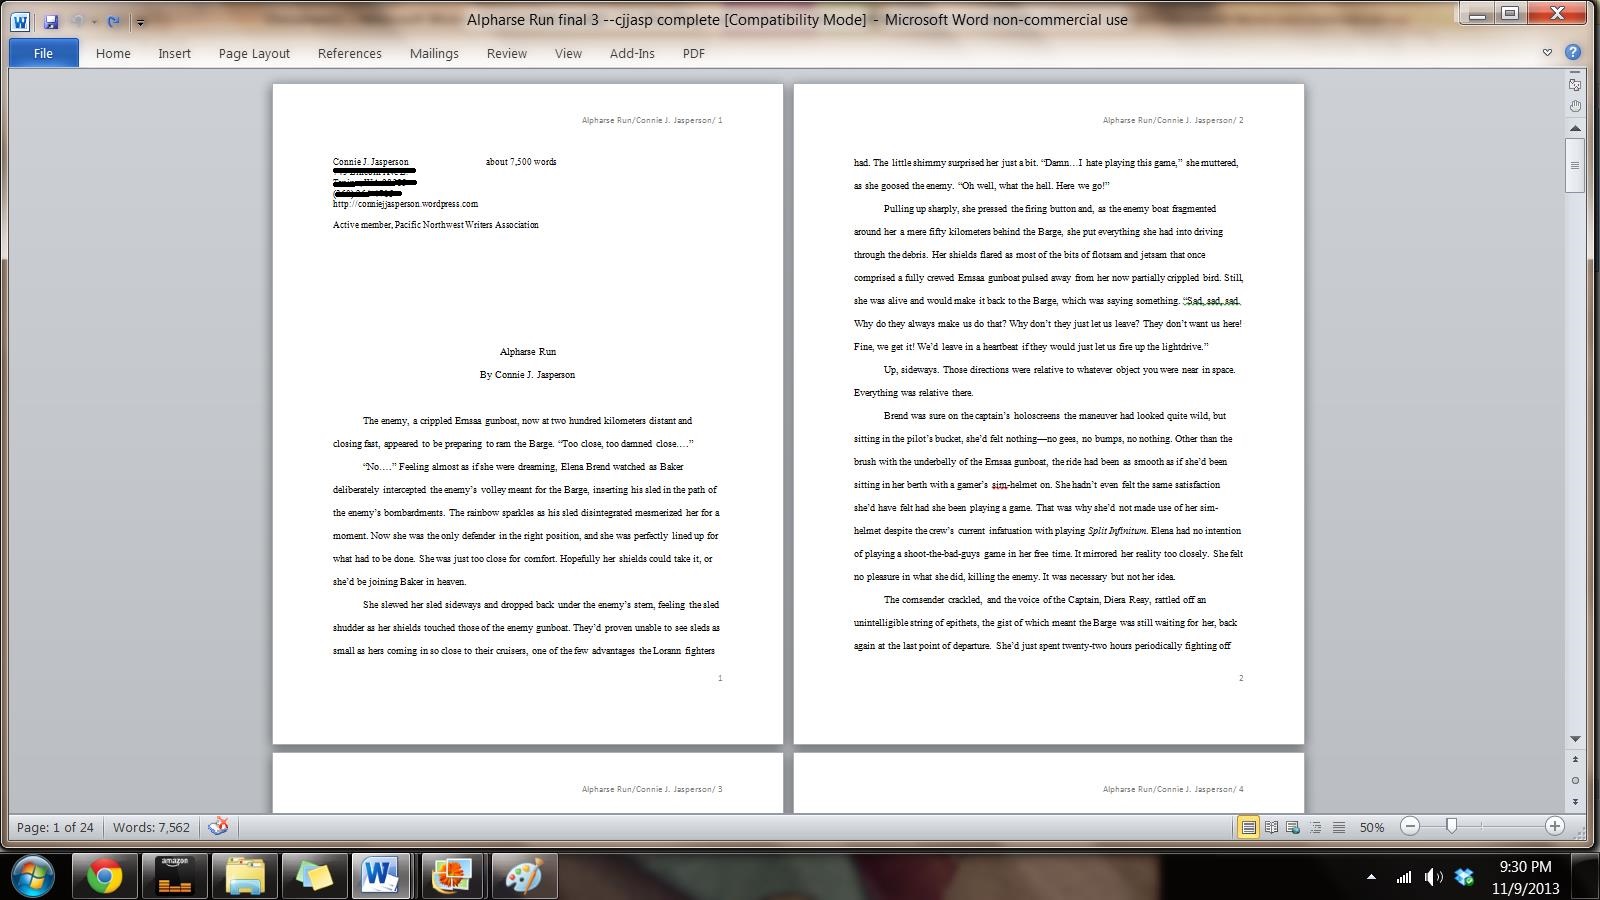
Now your manuscript:
- is aligned left
- has 1 in. margins
- is double-spaced
- has formatted indented paragraphs
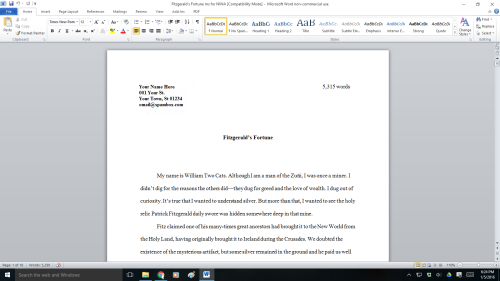
- The header contains title and author name and page numbers aligned right
- The first page contains your mailing address and contact information in upper left hand corner
For more on the subject of getting a manuscript ready for submission, check out my post of July 24, 2015, How to format your manuscript for submission.